2024-11-09 02:27:00
poniesandlight.co.uk
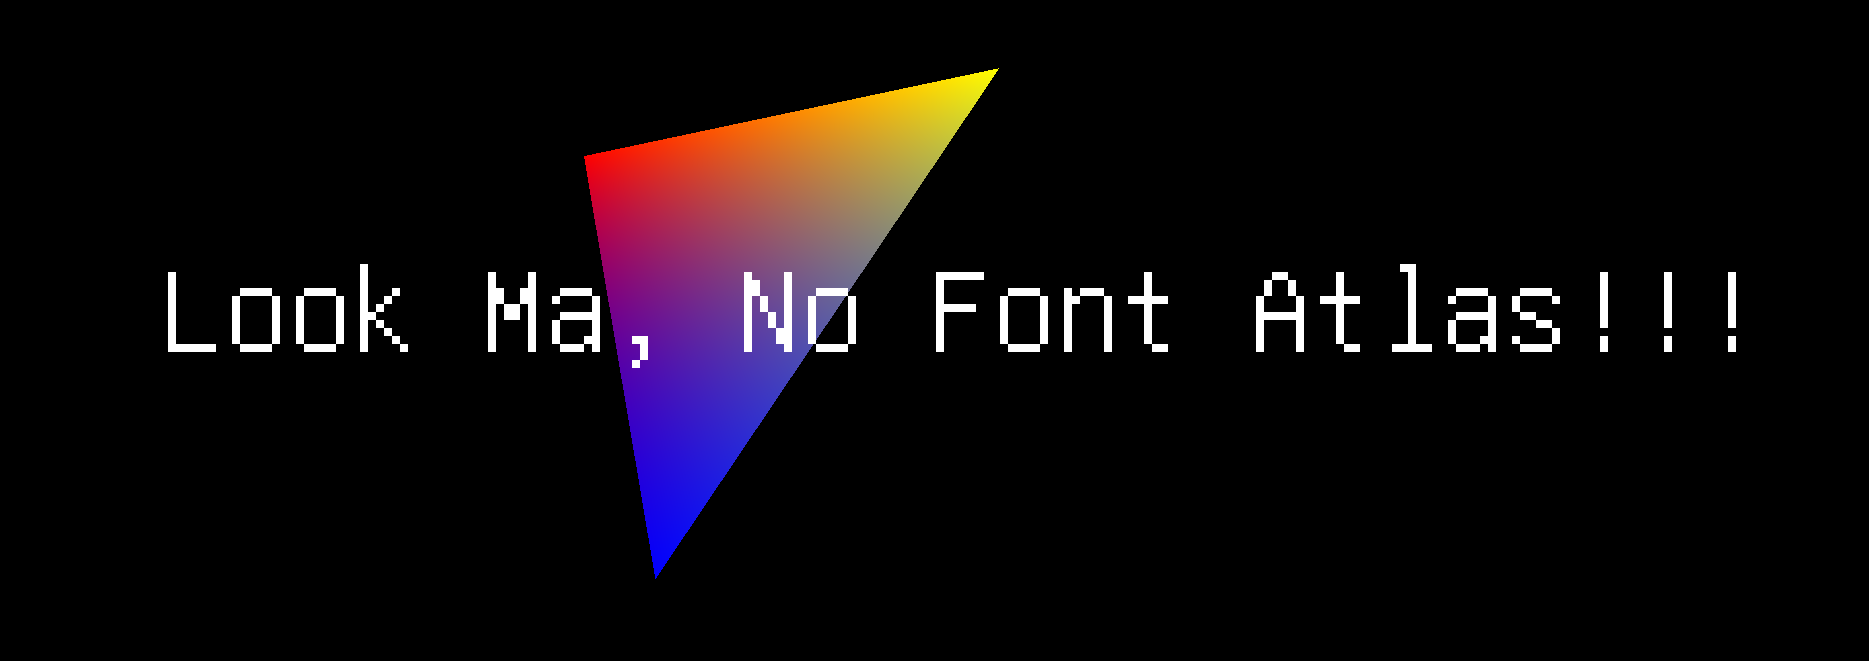
Sometimes, all you want is to quickly print some text into a Renderpass. But traditionally, drawing text requires you first to render all possible glyphs of a font into an atlas, to bind this atlas as a texture, and then to render glyphs one by one by drawing triangles on screen, with every triangle picking the correct glyph from the font atlas texture.
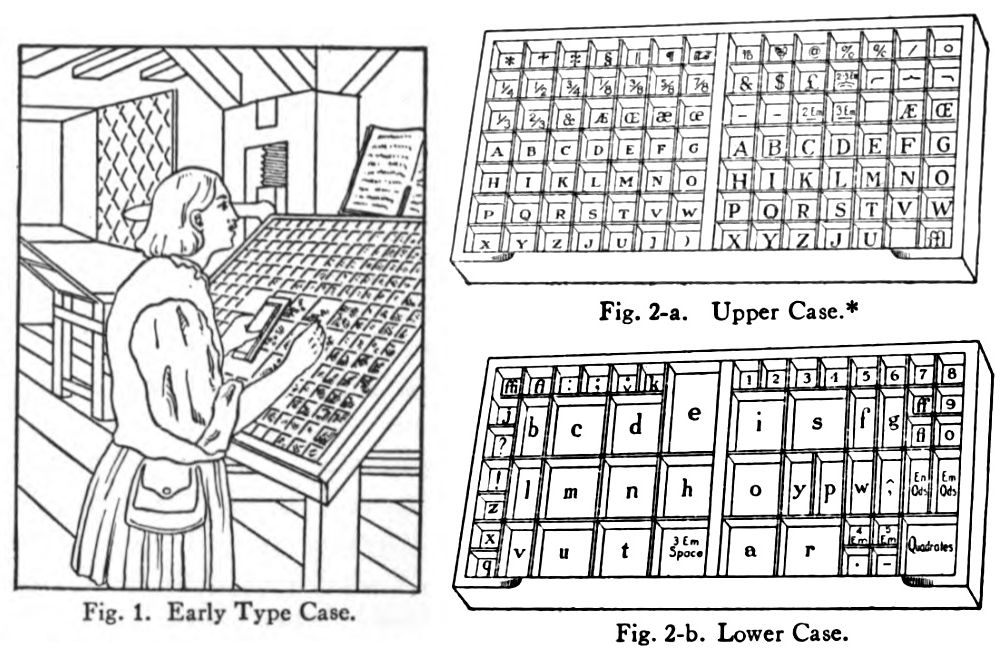
This is how imgui does it, how anyone using stb_truetype does it, and it’s delightfully close to how type setting used to be done ages bygone on physical letterpresses.
In case you wonder – yes
That’s enough (ed).
Quaint, correct, but also quite cumbersome.
What if – for quick and dirty debug messaging – there was a simpler way to do this?
Here, I’ll describe a technique for texture-less rendering of debug text. On top of it all, it draws all the text in a single draw call.
The Font: Pixels Sans Texture
How can we get rid of the font atlas texture? We’d need to store a font atlas or something similar directly inside the fragment shader. Obviously, we can’t store bitmaps inside our shaders, but we can store integer constants, which, if you squint hard enough, are nothing but maps of bits. Can we pretend that an integer is a bitmap?
0x42 in hex notation, translates to 0b01000010 in binary notation. If we assume that every bit is a pixel on/off value, we get something like this.
We can draw this to the screen using a GLSL fragment shader by mapping a fragment’s xy position to the bit that is covered by it in the “bitmap”. If the bit is set, we draw in the foreground colour. If the bit is not set, we draw in the background colour.
|
|
glsl
Now, one byte will only draw one line of pixels for us. If we want to draw nicer glyphs, we will need more bytes. If we allowed 16 bytes per glyph, this would give us an 8×16 pixel canvas to work with. A single uvec4, which is a built-in type in GLSL, covers exactly the correct amount of bytes that we need.
A encoded in 16 bytes, stored as an uvec4, that’s 4 uints with each 4 bytes.
16 bytes per glyph seems small enough; It should allow us to encode the complete ASCII subset of 96 printable glyphs in all of 1536 bytes of shader memory.
Where do we get the bitmaps from?
Conveniently, the encoding of a font into bitmaps such as described above is very much the definition of the venerable PSF1 format, give or take a few header bytes. We can therefore harvest the glyph pixels from any PSF1 terminal font by opening it in a hex editor such as ImHex, travelling past the header (4 bytes) and the first section of non-printable glyphs (512 bytes), and then exporting the raw data for the next 96 glyphs (1536 bytes) by using “Copy as → C Array”.
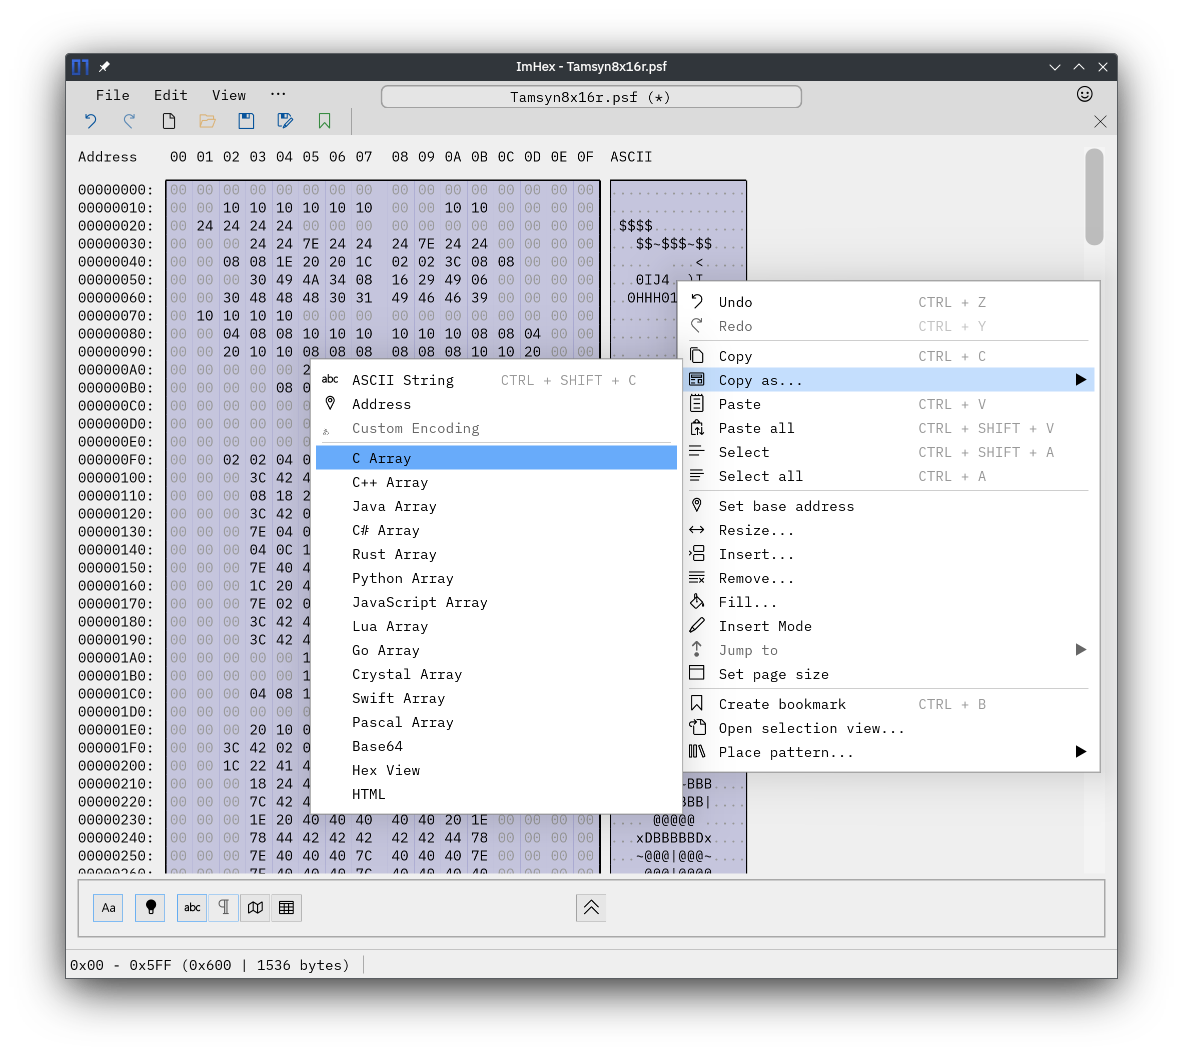
This will give us a nicely formatted array of chars, which we can easily edit into an array of uints, which we then group into uvec4s. We need to remember that just concatenating the raw chars into uints flips the endianness of our uints, but we can always flip this back when we sample the font data…
Once we’re done, this is how our font bitmap data table looks like in the fragment shader:
|
|
glsl
I say table, because the font_data array now stores the bitmaps for 96 character glyphs, indexed by their ASCII value (minus 0x20). This table therefore covers the full printable ASCII range from 0x20 SPACE to 0x7F BACKSPACE (inclusive), but in the snippet above I’m showing only 8 of them, to save space.
So far, all this is just so that we don’t have to bind a texture when drawing our text. But how to draw the text itself?

One Draw Call, That’s All.
We’re going to use a single instanced draw call.
With instanced drawing, we don’t have to repeatedly issue draw instructions, since we encode the logic into per-instance data. One draw call contains everything we need, provided it uses two attribute streams. The fist stream, per-draw, has just the necessary information to draw a generic quad. And the second stream, per-instance, packs the two pieces of information that change with every instance of such a quad: First, a position offset, so that we know where in screen space to draw the quad. And second, of course, the text that we want to print.
For the position offset we can use one float each for x and y, which leaves two floats for this particular attribute binding unused. We have more than enough space to use one extra float to pack in a font scale parameter, if we like.
For the text that we want to print, we have a similarly wasteful situation – the smallest basic vertex attribute data type is usually 32bit wide, and so it makes sense to make best use of this and pack at least 4 characters at a time. If we do this, we must make sure that the message that we want to print has a length divisible by 4. If it was shorter, we need to fill up the difference with zero byte (\0) characters. Conveniently, the zero byte is also used to signal the end of a c-string.
Our per-instance data looks like this:
|
|
cpp
It’s the application’s responsibility to split up the message into chunks of 4 characters, to convert these four characters into an unit32_t, and to store it into a word_data struct together with the position offset for where on screen to render these four characters. Once a word_data is filled, we append it into an array where we accumulate all the data for our text draw calls. Once we are ready to draw, we can then bind this array as a per-instance binding to our debug text drawing pipeline, and draw all text with a single instanced draw call.
More interesting things happen in the vertex and fragment shader of the debug text drawing pipeline.
Vertex Shader
Our vertex shader produces three outputs.
First, it writes to gl_Position to place the vertices for our triangles on the screen. This operates in NDC “screen space” Coordinates. We calculate an offset for each vertex using the per-instance pos_and_scale attribute data.
The second output of the vertex shader is the word that we want to render: We just pass though the attribute uint as an output to the fragment shader – but we make sure to use the flat qualifier so that it does not get interpolated.
And then, the vertex shader synthesizes texture coordinates (via gl_VertexIndex). It does so pretty cleverly:
12 >> gl_VertexIndex & 1will give a sequence0, 0, 1, 1,9 >> gl_VertexIndex & 1will give a sequence1, 0, 0, 1,
This creates a sequence of uv coordinates (0,1), (0,0), (1,0), (1,1) in a branchless way.
|
|
glsl
If we at this point visualise just the output of the vertex shader, we will get something like this:

outTexCoord uv coords. Note that these are continuous (smooth).
Fragment Shader
Our fragment shader needs three pieces of information to render text, two of which it receives from the vertex shader stage:
- The fragment’s interpolated uv coordinate,
uv - The character that we want to draw,
in_word - The font data array,
font_data
To render a glyph, each fragment must map its uv-coordinate to the correct bit of the glyph bitmap. If the bit at the lookup position is set, then render the fragment in the foreground colour, otherwise render it in background colour.
This mapping works like this:
First, we must map the uv coordinates to word pixel coordinates. The nice thing about these two coordinate systems is that they both have their origin at the top left.
We know that our uv coordinates are normalised floats going from vec2(0.f,0.f) to vec2(1.f,1.f), while our font pixel coordinates are integers, going from uvec2(0,0) to uvec2(7,15).
We also must find out which one of the four characters in the word to draw.
|
|
glsl

word_pixel_coord (normalised)

glyph_pixel_coord (normalised)
Remember, to draw a character, we must look up the character in the font bitmap table, where we must find the correct bit to check based on the uv coordinate of the fragment. You will notice that in the first GLSL example above, we were only worried about the .x coordinate. Now, let’s focus on .y, so that we can draw more lines of pixels by looking up the correct line to sample from.
Let’s do this step by step. First, we fetch the character bitmap from our font_data as an uvec4. Then we use the glyph_pixel_coord.y to pick the correct one of 4 uints that make up the glyph. This will give us four lines of pixels.
|
|
glsl
Once we have the uint covering four lines, we must pick the correct line from it.
Note that lines are stored in reverse order because after we used ImHex to lift the bitmap bytes out of the font file, we just concatenated the chars into uint. This means that our bitmap uints have the wrong endianness; We want to keep it like this though, because it is much less work to just concatenate chars copied form ImHex than to manually convert endianness in a text editor.
|
|
glsl
And, lastly, we must pick the correct bit in the bitmap. Note the 7- – this is because bytes are stored with the most significant bit at the highest index. To map this to a left-to-right coordinate system, we must index backwards, again.
|
|
glsl
We now can use the current pixel to shade our fragment, so that if the pixel is set in the bitmap, we shade our fragment in the foreground colour, and if it is not set, shade our fragment in the background colour:
|
|
glsl

What about the fill chars that get inserted if our printable text is too short to be completely divisible by 4? We detect these in the fragment shader: In case were are about to render such a fill character, we should do absolutely nothing, not even draw the background. We can do this by testing printable_character, and issuing a discard in case the printable character is \0.
A Visual Summary
It is said that an image is worth a thousand words. Why not have both? Here is a diagram which summarises the mapping from quad-uv space to glyph bitmap space:

Note: Our Fragment position is marked by the blue speck.
① pick the correct character from our per-quad word. ② calculate the offset into font_data using the character ASCII code. ③ fetch the uvec4 that holds the bitmap for our glyph from font_data ④ pick the uint representing the four lines of the glyph that our fragment falls in (via its y-coord) ⑤ pick the correct line using the fragment’s .y coord ⑥ pick the correct bit using the per-glyph x coordinate.
Full Implementation & More Source Code
Using this technique, it is now possible, from nearly anywhere in an Island project, to call:
|
|
cpp
And see the following result on screen:

Acknowledgements
- Diagrams drawn with Excalidraw
- Original source data for the pixel font came from Tamsyn, a free pixel font by Scott Fial
Backlinks
This article was featured on Graphics Programming Weekly, and discussed on Lobste.rs, and Hacker News.
If you like more of this, subscribe to the rss feed, and if you want the very latest, and hear about occasional sortees into generative art and design, follow me on bluesky or mastodon, or maybe even Instagram. Shameless plug: my services are also available for contract work.
RSS:
Find out first about new posts by subscribing to the RSS Feed
Further Posts:
Support Techcratic
If you find value in Techcratic’s insights and articles, consider supporting us with Bitcoin. Your support helps me, as a solo operator, continue delivering high-quality content while managing all the technical aspects, from server maintenance to blog writing, future updates, and improvements. Support Innovation! Thank you.
Bitcoin Address:
bc1qlszw7elx2qahjwvaryh0tkgg8y68enw30gpvge
Please verify this address before sending funds.
Bitcoin QR Code
Simply scan the QR code below to support Techcratic.

Please read the Privacy and Security Disclaimer on how Techcratic handles your support.
Disclaimer: As an Amazon Associate, Techcratic may earn from qualifying purchases.


![Ted Lasso: The Richmond Way BD [Blu-ray]](https://techcratic.com/wp-content/uploads/2024/11/71IXM3sX7-L._SL1500_-360x180.jpg)


![Alien 3 [Blu-ray]](https://techcratic.com/wp-content/uploads/2024/11/91YlnAd8ibL._SL1500_-360x180.jpg)


