Introduction:
Setting up a home network is essential for modern-day connectivity, allowing seamless communication and resource sharing between devices. This comprehensive guide will walk you through each step of the process, ensuring you have a robust and functional network without relying on visuals.
Step 1: Gather Your Equipment
- Selecting the right equipment is crucial for a smooth setup process. Ensure you have:
- A high-quality router: Consider factors like Wi-Fi coverage, number of Ethernet ports, and supported features (such as guest networks or Quality of Service).
- Ethernet cables: Opt for Cat6 or Cat6a cables for optimal performance, especially for devices requiring high-speed connections.
- Devices to connect: This includes computers, laptops, smartphones, smart TVs, gaming consoles, printers, and any other network-enabled devices.
Step 2: Connect Your Router
- Proper placement of the router is essential for optimal coverage. Choose a central location, away from obstructions and interference.
- Begin by connecting one end of an Ethernet cable to the WAN port (often labeled “Internet”) on your router.
- Connect the other end of the Ethernet cable to the Ethernet port on your modem, establishing the connection between your home network and the internet.
Step 3: Power On Your Equipment
- Plug in and power on your modem and router. Allow them sufficient time to initialize and establish connections. This process may take a few minutes.
Step 4: Access Your Router’s Configuration Page
- Open a web browser on a device connected to your router. You can use either an Ethernet connection or connect to the default Wi-Fi network broadcasted by the router. Our preference is to have a direct Ethernet connection when setting up the router.
- Enter the router’s IP address into the browser’s address bar. Typically, this is 192.168.1.1 or 192.168.0.1. Refer to the router’s manual if unsure.
- Log in to the router’s configuration page using the default username and password. For security reasons, it’s recommended to change these credentials after the initial setup.
Step 5: Configure Your Network Settings
- Customize your network settings according to your preferences and requirements:
- Set up a unique SSID (Service Set Identifier) for your Wi-Fi network to distinguish it from neighboring networks.
- Choose a strong Wi-Fi password using a combination of uppercase and lowercase letters, numbers, and special characters.
- Configure security settings such as WPA2-PSK encryption to safeguard your network against unauthorized access.
- Explore advanced settings like port forwarding, dynamic DNS, and VPN (Virtual Private Network) if needed.
Step 6: Connect Your Devices
- Connect your devices to the network using either wired or wireless connections:
- For wired connections, use Ethernet cables to connect devices directly to the router’s LAN ports.
- For wireless connections, search for your Wi-Fi network on each device, select it, and enter the Wi-Fi password when prompted.
Step 7: Test Your Network
- Verify the functionality of your network by performing various tests:
- Test internet connectivity on each device to ensure they can access websites, stream content, and download files without issues.
- Measure Wi-Fi signal strength and coverage throughout your home using a Wi-Fi analyzer tool or a mobile app.
- Test network speed using online speed testing tools to ensure optimal performance.
Conclusion:
Congratulations! You’ve successfully set up a comprehensive home network, providing reliable connectivity to all your devices. Remember to periodically review and update your network settings to maintain security and performance. If you encounter any challenges along the way, refer to the router’s manual or seek assistance from online resources and forums. Enjoy your seamlessly connected home environment!
Some helpful tips:
In our comprehensive guide to enhancing home network security, we’ve covered various aspects of setting up a robust network. However, it’s worth reiterating the importance of maintaining and upgrading your router to optimize performance and security. Our reiterations are only to reinforce your knowledge.
- Change Default Credentials: Immediately change the default username and password for accessing your router’s configuration settings. Default credentials are well-known and can be exploited by attackers. Techcratic is restating this as this is highly recommended.
- Enable Encryption: Utilize strong encryption protocols such as WPA2-PSK (Wi-Fi Protected Access 2 with Pre-Shared Key) or WPA3 for securing your Wi-Fi network. Avoid using outdated or weak encryption methods like WEP (Wired Equivalent Privacy).
- Regular Firmware Updates: Keep your router’s firmware up to date by installing manufacturer-provided updates. Firmware updates often include security patches that address known vulnerabilities and improve overall performance.
- Disable Remote Management: Unless absolutely necessary, disable remote management features on your router. Remote management can be exploited by attackers if left enabled, potentially allowing them to gain unauthorized access to your router’s settings.
- Use a Strong Wi-Fi Password: Create a complex and unique Wi-Fi password consisting of a mix of alphanumeric characters, symbols, and uppercase/lowercase letters. Avoid using easily guessable passwords or common dictionary words.
- Implement Guest Networks: If your router supports it, set up a separate guest network for visitors. This network should have limited access to your main network resources and should be isolated from your primary devices for added security.
- Enable Network Encryption: Whenever possible, enable encryption for network traffic, especially if you frequently access sensitive information or perform online transactions. VPN (Virtual Private Network) services provide an additional layer of encryption and anonymity for your internet connection.
- Disable UPnP: Universal Plug and Play (UPnP) can pose security risks by automatically opening ports on your router, potentially exposing your network to external threats. Consider disabling UPnP unless it’s necessary for specific applications or devices.
- Monitor Connected Devices: Regularly review the list of devices connected to your router to detect any unauthorized access. Most modern routers provide options to view connected devices, allowing you to identify and remove unknown or suspicious devices.
- Enable Firewall Protection: Activate your router’s built-in firewall to filter incoming and outgoing network traffic, blocking potentially malicious connections and protecting your network from unauthorized access and cyber threats.
If you have any questions please leave them below, or check your routers website or manual.
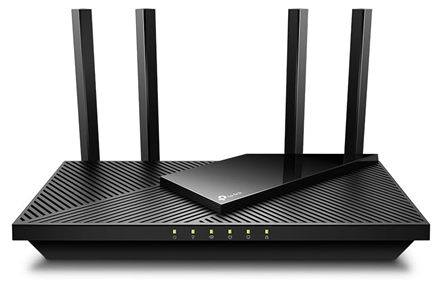
Before you go, are you ready to supercharge your home network? Then upgrade to the TP-Link AX1800 WiFi 6 Router today and experience blazing-fast speeds, unparalleled connectivity, and enhanced security features. With support for the latest WiFi 6 technology, this router delivers lightning-fast wireless performance, perfect for streaming, gaming, and connecting multiple devices simultaneously. Say goodbye to buffering and lagging and hello to seamless, uninterrupted connectivity. Don’t settle for sluggish internet speeds any longer—take your home network to the next level with the TP-Link AX1800 WiFi 6 Router.


![[SWTT] Generative Art NFT Tutorial](https://techcratic.com/wp-content/uploads/2025/07/1752552896_maxresdefault.jpg)


