


![[SWTT] Generative Art NFT Tutorial](https://techcratic.com/wp-content/uploads/2025/07/1752552896_maxresdefault.jpg)


Whether you’re a beginner or an experienced developer, this step-by-step tutorial will give you a solid understanding of blockchain fundamentals and hands-on experience building one. By the end, you’ll have a functional blockchain that you can expand and customize for your own projects.
Why Build Your Own Blockchain?
Building a blockchain is a great way to:
- Understand blockchain technology: Learn how blocks, hashes, and consensus algorithms work.
- Gain practical experience: Get hands-on with coding and blockchain architecture.
- Explore real-world applications: See how blockchains can be used in industries like finance, healthcare, and more.
What You’ll Need
To build your blockchain, you’ll need:
- A computer with Python or Node.js installed.
- Basic knowledge of programming (Python or JavaScript).
- A code editor like VS Code.
- Curiosity and a willingness to learn!
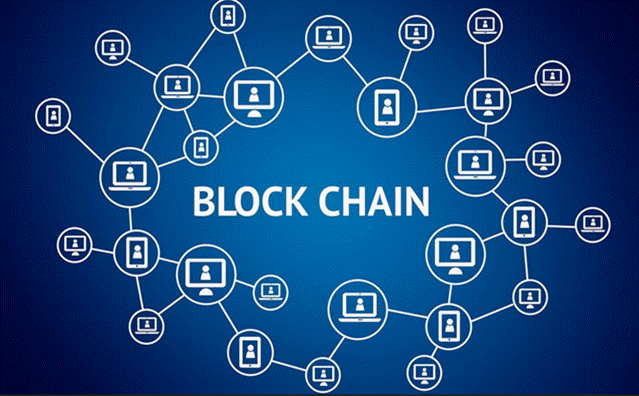
Step 1: Understand the Basics of Blockchain
Before diving into code, let’s break down what a blockchain is:
- Blocks: A blockchain is a chain of blocks, where each block contains data (e.g., transactions).
- Hashes: Each block has a unique hash (a cryptographic fingerprint) that links it to the previous block.
- Consensus Algorithms: These ensure all participants agree on the state of the blockchain (e.g., Proof of Work or Proof of Stake).
Step 2: Set Up Your Development Environment
First, let’s set up your environment. We’ll use Python for this tutorial, but you can also use JavaScript (Node.js) if you prefer.
- Install Python from python.org.
- Install a code editor like VS Code.
- Create a new project folder and open it in your code editor.
Step 3: Create Your First Block
Let’s start by creating a simple block. Each block will have:
- An index (block number).
- A timestamp.
- Data (e.g., transactions).
- A hash of the previous block.
- Its own hash.
Here’s the Python code to create a block:
import hashlib
import time

class Block:
    def __init__(self, index, previous_hash, data, timestamp):
        self.index = index
        self.previous_hash = previous_hash
        self.data = data
        self.timestamp = timestamp
        self.hash = self.calculate_hash()

    def calculate_hash(self):
        block_string = f"{self.index}{self.previous_hash}{self.data}{self.timestamp}"
        return hashlib.sha256(block_string.encode()).hexdigest()

# Create the first block (genesis block)
genesis_block = Block(0, "0", "Genesis Block", time.time())
print(f"Genesis Block Hash: {genesis_block.hash}")
Step 4: Build the Blockchain
Now that we have a block, let’s create a blockchain. A blockchain is essentially a list of blocks, where each block points to the previous one.
Here’s how to create a blockchain in Python:
class Blockchain:
    def __init__(self):
        self.chain = [self.create_genesis_block()]

    def create_genesis_block(self):
        return Block(0, "0", "Genesis Block", time.time())

    def get_latest_block(self):
        return self.chain[-1]

    def add_block(self, new_block):
        new_block.previous_hash = self.get_latest_block().hash
        new_block.hash = new_block.calculate_hash()
        self.chain.append(new_block)

# Create a blockchain and add a new block
my_blockchain = Blockchain()
my_blockchain.add_block(Block(1, "", "Block 1 Data", time.time()))
print(f"Block 1 Hash: {my_blockchain.chain[1].hash}")
Step 5: Implement a Consensus Algorithm
Consensus algorithms ensure all participants agree on the state of the blockchain. Let’s implement a simple Proof of Work (PoW) algorithm.
Here’s how to add PoW to your blockchain:
class Block:
    def __init__(self, index, previous_hash, data, timestamp, nonce=0):
        self.index = index
        self.previous_hash = previous_hash
        self.data = data
        self.timestamp = timestamp
        self.nonce = nonce
        self.hash = self.calculate_hash()

    def calculate_hash(self):
        block_string = f"{self.index}{self.previous_hash}{self.data}{self.timestamp}{self.nonce}"
        return hashlib.sha256(block_string.encode()).hexdigest()

    def mine_block(self, difficulty):
        target = "0" * difficulty
        while self.hash[:difficulty] != target:
            self.nonce += 1
            self.hash = self.calculate_hash()
        print(f"Block mined: {self.hash}")

# Update the Blockchain class to include mining
class Blockchain:
    def __init__(self, difficulty=4):
        self.chain = [self.create_genesis_block()]
        self.difficulty = difficulty

    def add_block(self, new_block):
        new_block.previous_hash = self.get_latest_block().hash
        new_block.mine_block(self.difficulty)
        self.chain.append(new_block)

# Mine a new block
my_blockchain = Blockchain()
my_blockchain.add_block(Block(1, "", "Block 1 Data", time.time()))
Step 6: Test and Deploy Your Blockchain
Once your blockchain is ready, test it by adding multiple blocks and verifying the chain’s integrity. You can also deploy it as a simple API using Flask or Express.js.
Real-World Applications and Limitations
Blockchains have many real-world applications, including:
- Cryptocurrencies: Bitcoin, Ethereum, and others.
- Supply Chain Management: Track products from origin to consumer.
- Healthcare: Securely store and share patient records.
However, blockchains also have limitations, such as scalability issues and high energy consumption (for PoW).
Conclusion
Building your own blockchain is a rewarding project that deepens your understanding of this transformative technology. In just 48 hours, you can create a functional blockchain, implement a consensus algorithm, and explore real-world applications. Whether you’re a beginner or an expert, this guide gives you the tools to get started. So, what are you waiting for? Start building your blockchain today!

Get ready for out-of-this-world fun with the UFO Cow Abduction: Beam Up Your Bovine, the hilarious and quirky game that lets you “beam up” cows in your own UFO! With over 6,809 ratings and a 4.5-star average, it’s clear that players are loving the fun and challenge this game brings.
A hit with over 5,000 units sold just last month, you can grab your own copy for only $11.39 on Amazon! Whether you’re looking to add a little whimsy to your gaming collection or want a great gift for friends and family, this game delivers non-stop fun. Order now for just $11.39 at Amazon!
Help Power Techcratic’s Future – Scan To Support
If Techcratic’s content and insights have helped you, consider giving back by supporting the platform with crypto. Every contribution makes a difference, whether it’s for high-quality content, server maintenance, or future updates. Techcratic is constantly evolving, and your support helps drive that progress.
As a solo operator who wears all the hats, creating content, managing the tech, and running the site, your support allows me to stay focused on delivering valuable resources. Your support keeps everything running smoothly and enables me to continue creating the content you love. I’m deeply grateful for your support, it truly means the world to me! Thank you!
|
BITCOIN
bc1qlszw7elx2qahjwvaryh0tkgg8y68enw30gpvge Scan the QR code with your crypto wallet app |
|
DOGECOIN
D64GwvvYQxFXYyan3oQCrmWfidf6T3JpBA Scan the QR code with your crypto wallet app |
|
ETHEREUM
0xe9BC980DF3d985730dA827996B43E4A62CCBAA7a Scan the QR code with your crypto wallet app |


Please read the Privacy and Security Disclaimer on how Techcratic handles your support.
Disclaimer: As an Amazon Associate, Techcratic may earn from qualifying purchases.


