2025-06-12 09:37:00
github.com
What if the GameCube Keyboard Controller worked with Animal Crossing…?
It started out as a “quick, simple project”, then quickly turned into seven quick simple projects.
Typing in Animal Crossing (GCN) is painfully slow.
Or, at least.. it was. Not anymore.
Pro Gamer WPM (unassisted): TBDTool-assisted WPM: Also TBD
Compose digital diary entries in style with this set of 81 custom, 3D printed keycaps that map perfectly to Animal Crossing’s in-game character set.
See the separate pico-crossing-keycaps repository for FreeCAD project files and OBJ exports.
Cycle through your favorite Town Tunes without having to futz about with e-Reader cards.
Type the name of (almost) any item, and this little raccoon-looking guy will give it to you for free.
Usage: press Shift + Alt + 🗝️, then type the name of any compatible item
Convert any image to display in Animal Crossing’s pattern editor. The script automatically sets up a Python environment and handles all dependencies.
Basic usage:
./convert_image.sh monalisa.jpg
See image_tools/README.md for advanced usage.
Convert videos to animated sequences in Animal Crossing (requires ffmpeg for video processing).
Basic usage:
./convert_video.sh rickroll.mp4
See image_tools/README.md for advanced usage.
It’s more likely than you think.
Usage: press the S key while a design (image or video) is being entered.
You’ll need:
- a Raspberry Pi Pico (or Pi Pico W)
- two GameCube controller extension cables
- two 1k Ω resistors (1/4W or higher)
- one 1N5817 Schottky diode (protects GameCube from USB 5V backfeeding during flashing/debugging)
Assembly:
- Cut both extension cables and strip back the outer sleeve to reveal the 5 inner wires. You’ll need two female plugs and one male plug.
- Important: Verify your extension cable pinouts before soldering! The colors in the provided schematic correspond to the “High Quality” labeled cables I used, but colors may vary between manufacturers or even batches.
- Solder the components to the Pi according to the schematic:
- Install the Schottky diode between the male plug’s 5V line and the Pi’s VSYS pin (cathode toward VSYS), then connect the 5V line from the male plug directly to the 5V lines on both of the female plugs.
- Install pull-up resistors connecting the Pi’s 3.3V supply to GPIO 3 and GPIO 4 on the Pi.
- Connect the 3.3V line from the male plug directly to the 3.3v lines on both of the female plugs (without connecting it to the Pi).
- Connect GND(POW) from the male plug to PIN 38 on the Pi and the GND(POW) lines on both of the female plugs.
- Connect GND(SIG) from the male plug to PIN 3 on the Pi and the GND(SIG) lines on both of the female plugs.
- Connect the DATA line from the male plug to GPIO 2 on the Pi. Connect the DATA lines from the female plugs to GPIO3 and GPIO4 on the Pi.
- Python 3 – Required for image/video conversion tools
- ffmpeg – Required for video conversion (
brew install ffmpegon macOS) - picotool – Required for flashing firmware to Pico
- Raspberry Pi Pico SDK – Set up according to official documentation
macOS:
Ubuntu/Debian:
sudo apt install picotool
This project includes several build scripts for different workflows:
For the fastest development cycle:
This script runs build → flash → monitor in sequence. Great for testing changes.
Build only:
Cleans and builds the project, generating the .uf2 firmware file.
Flash only:
Attempts to force the Pico into BOOTSEL mode and flash the firmware (no need to manually hold the BOOTSEL button).
Monitor serial output:
Opens a serial connection to view debug output from the Pico.
If the automatic flashing fails:
- Hold the BOOTSEL button while plugging in your Pico
- Copy the generated .uf2 file from the
build/directory to the RPI-RP2 volume
This project incorporates code from the following open source repositories:
joybus.hpp– GameCube controller communication interface (used directly)joybus.pio– PIO program for GameCube Joybus protocol (used directly)joybus.cpp– Joybus communication implementation (adapted with modifications)gcReport.hpp– GameCube controller report structure (used directly)
controller.pio– PIO program for reading controller input (used directly)
- Core SDK libraries and build system
pico_sdk_import.cmake– SDK integration helper
The Nook Codes defined in nookCodes.hpp are sourced from Nookipedia’s Animal Crossing (GCN) Data Spreadsheet (except the code for the Froggy Chair, which I generated using Nookipedia’s Secret Code Generator).
This project is licensed under GPLv3, which ensures compatibility with all incorporated dependencies.
If you work for Nintendo, Please Understand:
No emulation was used in the making of this project, and no game binaries were distributed or modified in the slightest. All footage was captured on unmodified hardware running unmodified, authentic software.
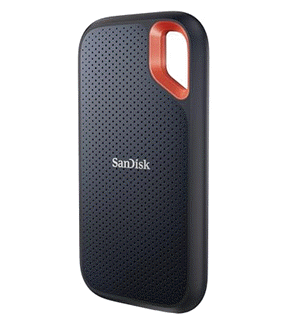
Keep your files stored safely and securely with the SanDisk 2TB Extreme Portable SSD. With over 69,505 ratings and an impressive 4.6 out of 5 stars, this product has been purchased over 8K+ times in the past month. At only $129.99, this Amazon’s Choice product is a must-have for secure file storage.
Help keep private content private with the included password protection featuring 256-bit AES hardware encryption. Order now for just $129.99 on Amazon!
Help Power Techcratic’s Future – Scan To Support
If Techcratic’s content and insights have helped you, consider giving back by supporting the platform with crypto. Every contribution makes a difference, whether it’s for high-quality content, server maintenance, or future updates. Techcratic is constantly evolving, and your support helps drive that progress.
As a solo operator who wears all the hats, creating content, managing the tech, and running the site, your support allows me to stay focused on delivering valuable resources. Your support keeps everything running smoothly and enables me to continue creating the content you love. I’m deeply grateful for your support, it truly means the world to me! Thank you!
|
BITCOIN
bc1qlszw7elx2qahjwvaryh0tkgg8y68enw30gpvge Scan the QR code with your crypto wallet app |
|
DOGECOIN
D64GwvvYQxFXYyan3oQCrmWfidf6T3JpBA Scan the QR code with your crypto wallet app |
|
ETHEREUM
0xe9BC980DF3d985730dA827996B43E4A62CCBAA7a Scan the QR code with your crypto wallet app |
Please read the Privacy and Security Disclaimer on how Techcratic handles your support.
Disclaimer: As an Amazon Associate, Techcratic may earn from qualifying purchases.


